Method to the madness by Makk
This tutorial is intended to give you an indication of the process I use when skinning. It wont show you how to this or how to do that, just show you the tools that I use and the steps I take when skinning. And before we start this is only one way to go about it, you may find your method better, if so then stick to it.
-----------------------
The programs that I use-
BodyWarp for exporting the UV's
Simpose for viewing the skin on the mesh
Adobe Photoshop 6 for the painting of the skin
WinAmp for listening to music while I skin!
And instead of using a mouse, I use a Wacom Graphire 2 tablet, they're great, heaps easier to use then a mouse. Check 'em out here.
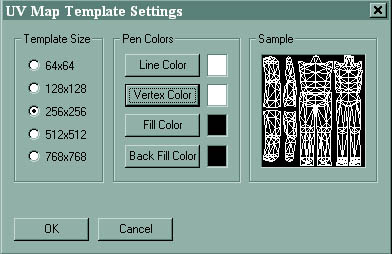
When first starting off the very first thing I do is find a mesh that suits my idea the most. Once found, I load it up into Bodywarp. From there I export the UV map of it (File, Save UVMap template..) with the following settings-
I do this beaus it give you a much greater idea of where things will appear on the mesh.
Next its time to load up PhotoShop.
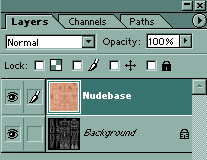
Now I open up the UVMap template that I saved just before, make a new layer and save it as a Photoshop file. I then open the right nudebase skin that I'm going to use (Click here to download the nudebase set).
Now on the new layer, I paste the nudebase skin to use as the base of the skin (the fleshy bits)
So at this point this is how my layer menu looks like-
I then hide the nudebase layer and select the polygonal lasso tool ![]() Using this tool I go around the outside of different parts of the UVMap. This
is will select the area that are UV Mapped. Next, I go up to Select and click
on Inverse. This will select the opposite of what I selected, err...yeah.. then
I unhide the nude layer and make sure that layer is selected. Then press Backspace
to get rid of all the bits of skin that don't appear on the mesh. This will
leave me with this-
Using this tool I go around the outside of different parts of the UVMap. This
is will select the area that are UV Mapped. Next, I go up to Select and click
on Inverse. This will select the opposite of what I selected, err...yeah.. then
I unhide the nude layer and make sure that layer is selected. Then press Backspace
to get rid of all the bits of skin that don't appear on the mesh. This will
leave me with this-
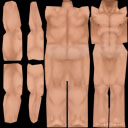
I do this because I now know where limbs end and begin, so its easier when lining up folds and avoiding nasty seams.
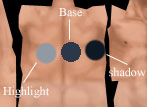
Colour picking time! First I choose a colour that will be the base colour, I try for a slighty-darker then normal tone. On a new layer called "Palette" I place each colour I use in nice, sexy little circles. Right, now to pick a colour of highlights........got it?...put it down on the palette layer, to the left of the base colour. I do the same for choosing a colour for shadows but on the right side.
Right after all that I'm ready to skin!...finally! I always listen to music when skinning, I think it helps me to stay motivated and helps me creatively.
Create a new layer, called "Pants" Fill in the section of the legs with the base colour. Check to see everything is looking good so far by checking it on the mesh in SimPose.
Now I use the airbrush set to about 4% opacity and start to gradually build the tone. I usually start at the back right leg, I don't know why, I just do. Painting using the shadow colour firstly to paint in the folds that crease the up the back of the leg(Small brush for folds, larger brush for shading).
Once those are in place, shade in the shape of the back of the leg (this is to define the body part, for example, the back thigh, calf, the left ass cheek). Do some more folds, more shading shapes. (Every now and again, I save it and view it in SimPose to check if everything is looking ok so far)
Once of done all the shadows, its time do fill in the highlights of the pants. Ok, I'm now done one half of the leg, (if I'm feeling lazy, I will duplicate it, then mirror, so now I have done the other side, quick, eh?!? I think I might do this for this tutorial, speed it up a bit) so I do the other, using the same process of shadows, then highlights.
Now for the front of the legs, I use the same process. Checking every now and again for seams and to see how it is shaping up.
Once the basic shading is done, I'll create new layer called "Darkers" and use a very dark version of the shadows, and using this, darken areas like inside the legs.
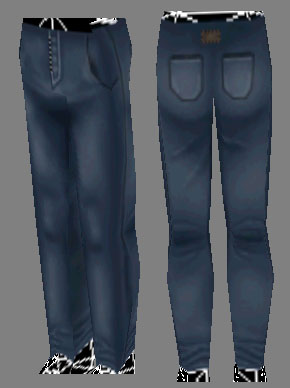
Once that is done, its time for the little extra little details like pockets, logos, zips, watches, jewelry, stitching or whatever you want to appear on the pants. Detailing is done on a new layer called...yep you guessed it, "Details"
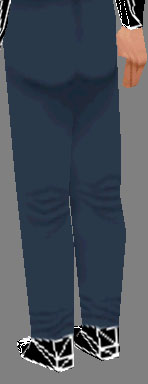
Waiter, legs are done-
For the t-shirt and top I use the exact same process, that is....
Now once the top is complete-

And I have done the shading for the pants and top, I may or may not (depending on the type of material I want it to look like) place a texture over the top of the pants or top or whatever, this is to make t look better and more realistic. I name this layer(s) texture and set the blend mode to either Overlay, Soft light or Hard light and then fiddle with the opacity setting until it
Next comes the shoes. There isn't much that goes into shoes, I just do a little bit of shading, a few lines for stitching and the shoe laces.
Now all that's left is to add the last bit of miscellaneous details. When I've done that then guess what.........
I've finished!!
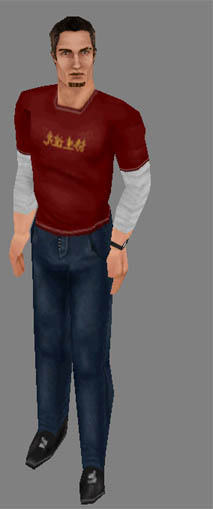
Well that wraps it up, I hope this is of some use to you, happy skinning!
:)
Makk