*DISCLAIMER*
I AM NO "EXPERT" AT PAINTING FOLDS, THE IDEA OF THIS IS TO GIVE BEGINNERS A GENERAL IDEA AND SOME HELP WITH PAINTING FOLDS. THIS IS INTENDED AS A GUIDE, NOT AS THE DEFINITIVE WAY OF PAINTING FOLDS. THERE PROBABLY ARE BETTER WAYS AT DOING THIS, BUT THIS IS THE WAY I DO THEM. DO NOT FLAME ME OR ACCUSE ME OF "THINKING IM ALL THAT" BECAUSE I'LL BE THE FIRST TO TELL YOU THAT MY STUFF NEEDS A LOT MORE WORK. ALSO DONT COMPLAIN TO ME THAT "MINE DOESN'T LOOK RIGHT" OR "WHY CANT I DO IT" BECAUSE IT TAKES TIME, PATIENCE AND PRACTICE.
------------------------------------------------------------------------------------------------------------------------------------------------------------------------------------------
Choose a background colour, Ive chosen a nice green colour ![]() (R-0.
G-166. B-82.) and filled the image with it.
(R-0.
G-166. B-82.) and filled the image with it.
Now lets choose the light and dark tones. For the light one Ive chosen this![]() (R-173. G-233. B-201.) And for the dark tone Ive chosen this
(R-173. G-233. B-201.) And for the dark tone Ive chosen this![]() (R-0. G-8. B-4.)
(R-0. G-8. B-4.)
I tend to zoom in around 400% so you get a larger picture to paint on.
Depending on what clothing you want to do(Leather, tight, baggy)and where on the skin your painting (Armpits, knee area, groin area, bottom of the pants) you will do different types of folds. For this tutorial Im going to pretend IM painting the folds on the bottom of some pants. If you are unsure of what it looks like the best advice is to try looking at real life examples (If you painting a pair of jeans, look at a picture so someone wearing jeans and look at the way they fold).
Ok get fill in the image with your background colour, now get out the airbrush
tool, choose a suitable brush size (IM using a size 20 pixel brush) and select
your light tone colour. Using the airbrush tool try to paint it a realistic
fold. In this case mine is going to be an almost smiley shape. This is how mine
ended up (NOTE: It may be a little hard to see but its there :) )
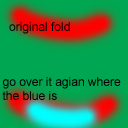
Very light but we will enhance it. Once youve done this its time to define the fold a bit more. Using the same brush and same colour go over it a couple of times but this time start from a bit closer in. For example-
This will help brighten/enhance the fold up a bit. This is how mine is looking
like
Now one more time go over it again but this time even closer in. For example
Now it will look not that much different but still it needs to be done.
After all that this is how mine looks like 
Now choose your dark tone and the same size brush, paint underneath the light fold. This will make it look kinda 3D and helps to define the fold (a lot!).
You only need to go over it once at this stage. Here is how mine looked like-
 purty snazzy!!
Using the same technique we did before, go over the shadow again but a bit closer in (like we did before with the light tone)
OK, this how mine looks like after that stage 
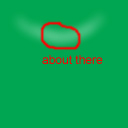
One more thing, go over it again just a small bit (See the example with the red circle, we'll just there but on the SHADOW, not the light tone)
And this how mine ended up
And viola!! thats how I do folds. This one is probably a little too bright, but its easily fixed by redoing it with a lighter pressure/opacity. With this technique, you will be able to apply it to painting folds all over your new skin. Here is one that I did a while ago, using the same techniques, but I spent a lot more time on it

Remember, and this is important, practice makes perfect! With time, patience and practice you can improve.
As I stated at the start, I am by NO MEANS an "expert" at this, I still have a LONG, LONG, LONG, LONG, LONG, LONG, LONG, LONG way to go before IM any good. Also this is by no means the be all, end all way of painting folds. Experiment with different shapes, tools and techniques and find the way that you like best.
Hopefully this has been some sort of help to you, so good luck to your skinning.........and practice!