Introduction to skinning
Step 1 - Laying the foundations.
If you haven't already go download the nude base skins from here. These are the best skins to start off with.
Open up your paint program and play around with it, become familiar with its tools and know how it works. Find out how to use the following tools -
-Airbrush, increase and decrease the opacity (In other words how thin and thick it comes out)
-Paint bucket fill, to fill/colour in areas with one click
-The selection tool, to fill areas you have selected with colours
-Does the program have some sort of layers options? (PhotoShop and PaintShop Pro have these)
-How to increase the colours to the most amount possible (When you paint/edit you should do this with the most amount of colours possible)
-How to reduce the colours to 256 colours, for when you save the skin.
*NOTE* I will use SimShow in this tutorial so make sure you get that from here
Now that you know your paint program its time to start skinning!
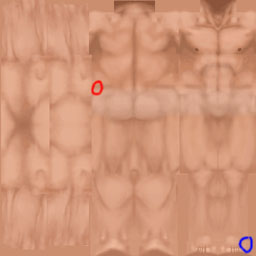
Open up the skin file (one of the nude skins that you should have) for this tutorial Im going to use this one-
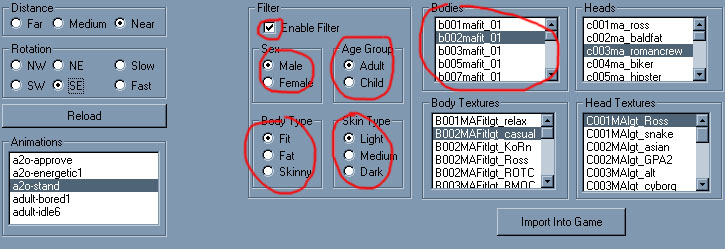
and have a look at SimShow. I am going to use the following settings for my skin-
Select your selection tool, it will look something like this
![]() and left click
about here-
and left click
about here-
and drag down to the blue circle, you should now have a selection like this-
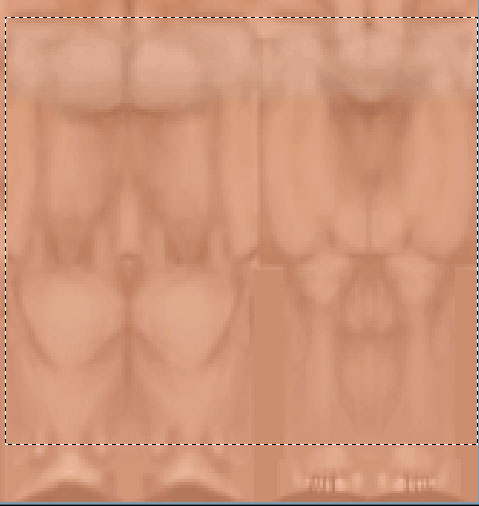
(If you don't keep trying until you do) If your paint program
allows you make a new layer. Now select a blue-ish colour and fill it in with
the bucket tool ![]() and fill in the selection with the blue colour.
and fill in the selection with the blue colour.
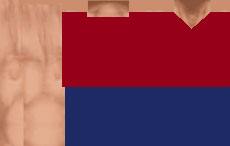
You should end up with something like this-

and viola the pants are done!
Now underneath the pants the shoes will go, using the select tool again make a selection of the feet (The same way you did the pants but from the top left of the feet to the bottom right of the feet) (make a new layer if you can) and this time fill it with a grey-ish colour. It should look something like this-

Now its time to preview it in SimShow, skins for the Sims requires them to have a maximum of 256 colours, if they have any more they wont work. So reduce the colours to 256 (This is different for every paint program so you will have to work that out for yourself IM afraid) and go to Save, next go to the folder of SimShow. Once you found that open up a folder called
GameData. Open that and find a folder called Textures, open that and type in the following B002MAFitlgt_XXXX. Where the XXXX is type in any name you want (For more on file names go here). Open up SimShow and select the options that were shown above (near the start of the page) and under the box called Body Textures find the one you just named (B002MAFitlgt_XXXX) and click on it and there it is! pretty basic but hey its your first time. If everything looks right give yourself a pat on the back. If it doesn't go over the steps again until you get it right (Or you can give up, your choice).
Right, back into ye olde paint program. If there is an Undo option click that until the point where you had just filled in the shoes with the grey colour. If you don't know how just make sure you increase the colours to as many as possible.
Next up is the last part the t-shirt this bit is tricky with
the neck. With this you will have to paint it in. So whip out the airbrush
tool, it looks something like this ![]() (Make
sure you have the opacity on the highest setting, 100) and begin (On a new
layer if you can) start to paint it so you end up with the following-
(Make
sure you have the opacity on the highest setting, 100) and begin (On a new
layer if you can) start to paint it so you end up with the following-
Once you got that right, preview it in SimShow (using the steps mentioned before). Make sure the neck area looks right, if it doesn't go back (Remember when I said "Right, back into ye olde paint program. If there is an Undo option click that until the point where you had just filled in the shoes with the grey colour. If you don't know how just make sure you increase the colours to as many as possible" Well do that except to the part just before you decreased it to 256 colours) until you get it right.
Once you have its only one small part away! Grab your selection
tool ![]() and make
a selection around this part of your ams-
and make
a selection around this part of your ams-

Once you got that then just fill it in (With the bucket tool) with the same colour as the top and then say to yourself- bidda bing, bidda boom, bidda BANG! you have just made your first skin! Time to see what it looks like in SimShow, so reduce the colours, save it in the Textures directory with same filename you gave it.
If you followed this gibberish, then this is what you will end up with-
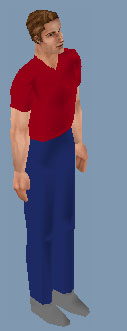
Very basic, but its a start :)
Makk